Search
Most searched

TOOL ADVISOR TUTORIAL

The WILA Tool Advisor is a high-end engineering application that allows you to identify the best press brake tool to suit your specific bending need. You can use the Tool Advisor in two ways: to solve a specific bending issue or to design a special tool.

Allow cookies?

To view this content, cookies must be accepted.

Edit cookie settings

How to work with the Tool Advisor


Draw your profile

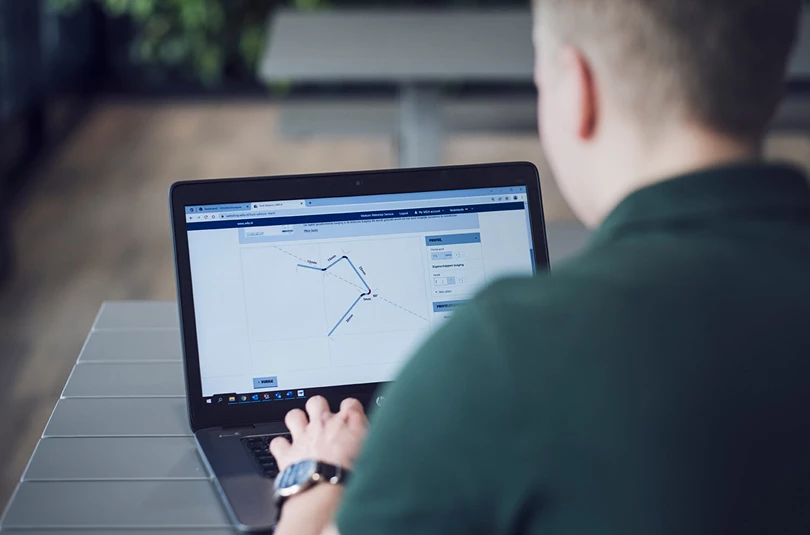
Draw your own profile by simply clicking and dragging on the canvas.

Receive tool advice

Based on the drawn profile, the properties and the selected machine the Tool Advisor will calculate your tool advice.

Customize your tool

Does the selected tool lead to collisions with the drawn profile? Simply customize the properties of the tool or let the Tool Advisor create a special tool.


Step 1: Select machine, draw profile

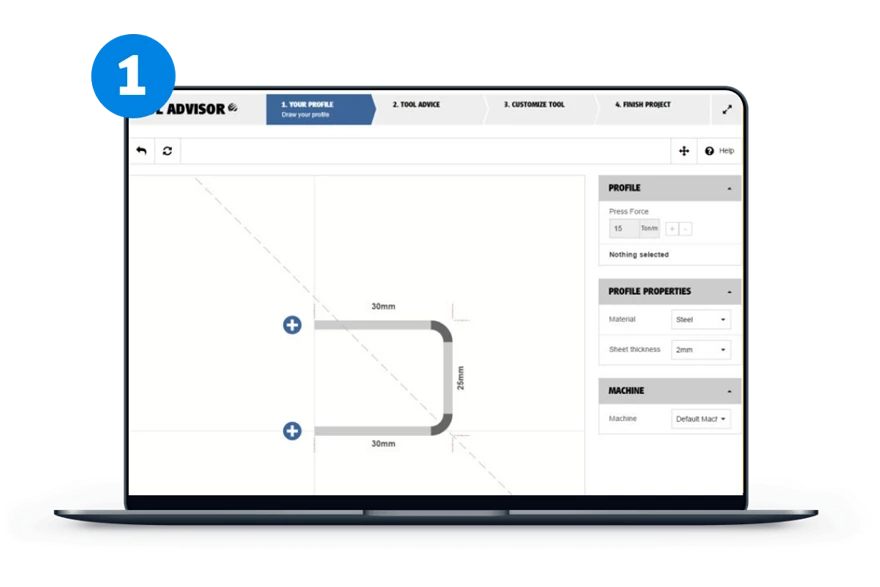
Select your machine and specify your profile properties

To get the best advice for your bending issue you start with selecting your machine. You can add your machine to the My Equipment section. If there is no machine information available the Tool Advisor will use a default machine instead (check Bending Information for details). Specify the material and the sheet thickness of the project you are working on. Both the machine and the profile properties influence the calculated tool advice. They can be adjusted on the 'Draw your profile' page.

Draw your profile

To begin drawing your profile, click and drag the blue button in the center of the canvas until the flange broadly has the desired length. From there on you can add new flanges on either side of the flange you just created. Your profile is also presented as a 'flat pattern' that shows your profile in unbend condition. Zoom in or out by scrolling in the canvas or pan by using the mouse and drag in the canvas.

Step 2: Edit properties


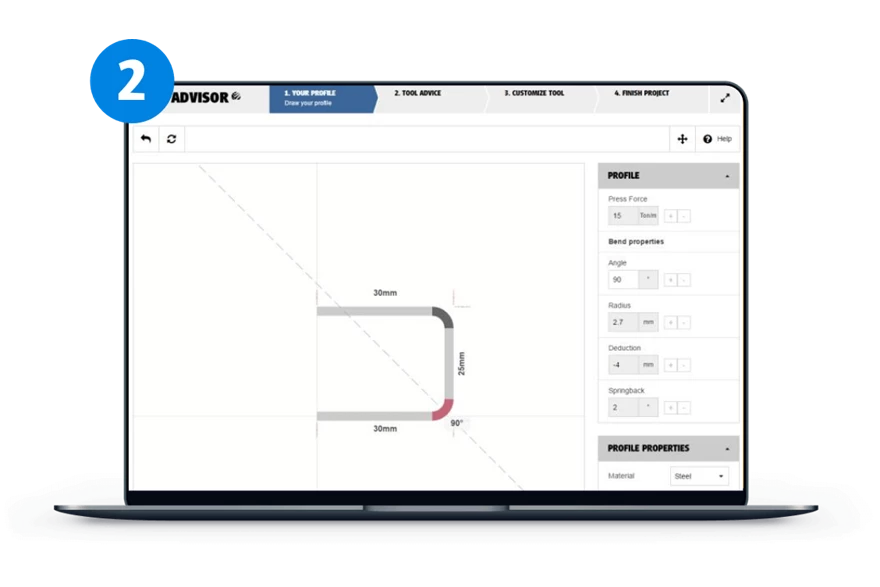
Change flange and/or bend values


To add more detail to your profile select a flange or bend and specify the values for the flange or bend in the profile section on the right side of the page. You can check the default bending process values and, if desired, override them (see Bending Information for details). To undo an action or start again use the 'Undo' or 'Reset' button in the upper left corner.

Satisfied with the result? Press the 'Next' button in the lower right corner of the screen. An overview will pop up with all previous actions including your drawn profile. Important to note: advice will be calculated based on your last selected bend (this is called the critical bend).

Step 3: Tool advice


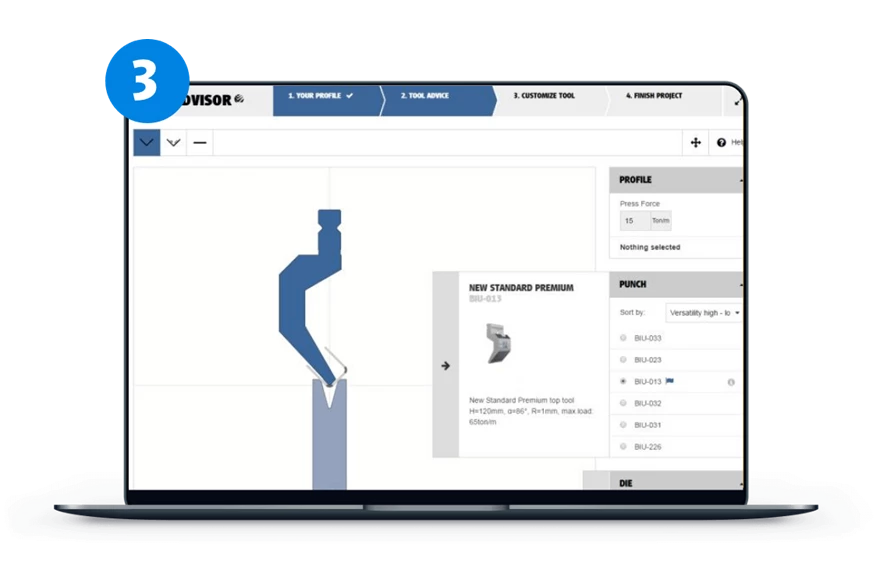
Which WILA New Standard Premium tools suit your project?

The tool advice is based on your profile and the information in My Equipment. Tools are sorted on versatility by default, but can also be sorted on price or loadability. Tools added to My Equipment are marked with a blue flag. Tools that do not combine with an already selected tool are marked with a red exclamation sign.


The drawn profile can be presented in three bending stages: normal, pressed and unfolded.

Red circles mark collisions at the section (and bending stage) where your profile interferes with a punch or die. If no standard tools are available for you profile, you can start customizing a standard tool on the next page. If there are no collisions present, you can add the desired length and receive prices on the next page.

* If you start from 'Design a tool' you can select the desired punch or die on this page.

Step 4: Customize tool


Create a tool that suits your profile

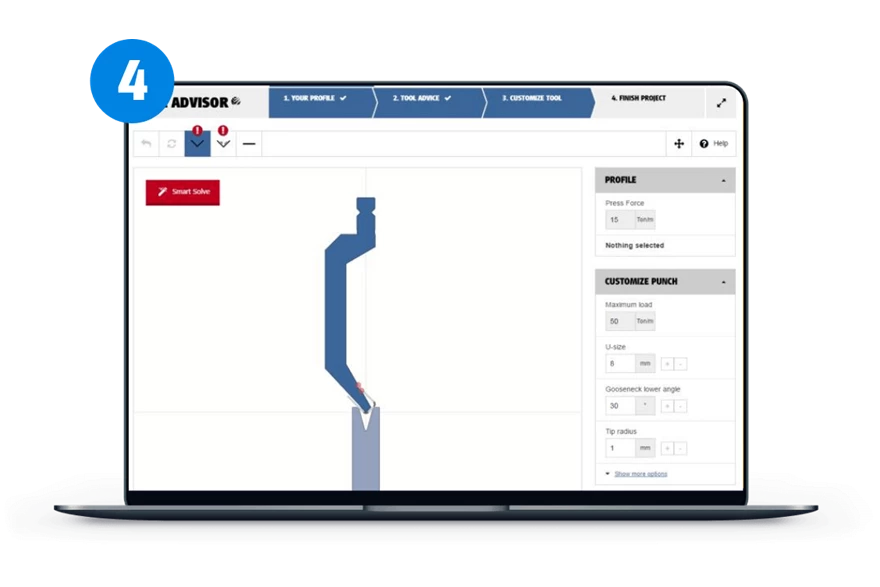
To remove collisions you can customize your tool. You can do this either manually or by using the Smart Solve button. After clicking the Smart Solve button the Tool Advisor will automatically search for the best way to customize the tool.

If you prefer to customize the tool manually, use the variables on the right side of the screen. The Tool Advisor presents the ones that are most likely to solve the collision, but you can find other variables under 'show more options'. It’s safe to try and customize your tool, the Tool Advisor will warn you if you encounter a geometric constraint or a maximum or minimum value for a variable (see Tooling Information for tooling properties). Once you are satisfied with the result, you can add the desired length and receive prices on the next page.

* If you start from 'Design a tool' you can select the desired punch or die on this page.

Step 5: Finish project


Select length and calculate prices

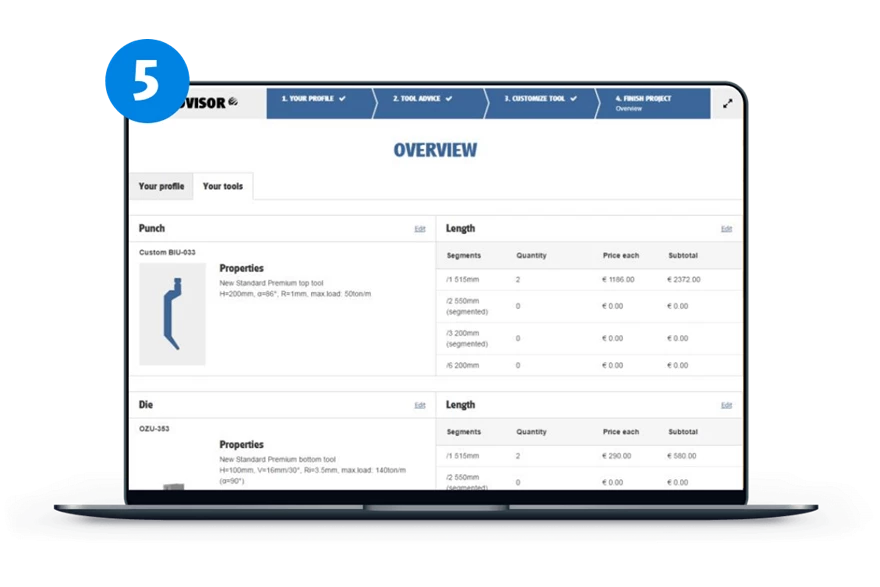
If you are satisfied with the selected (customized) tools, you can finish the project. Select your desired length and receive prices immediately. Check the overview of your project, including your drawn profile and selected (customized) tools.


Finish the project by adding your products to the shopping cart, and request a quote or submit your order. Please note the (default) process values that are applied to your profile. Together with the selected critical bend they are shown in the Profile menu on this page (see Bending Information for details). Finished projects and the projects you’re still working on can be found in the My Projects menu in the webshop.

Questions about using our Tool Advisor?

Get in touch with our Service & Support team during office hours on +31 (0) 573 289 850 or send them an email.

Mail Service & Support

Find a dealer close to you

WILA dealers have the knowledge and expertise to support your press brake tooling needs. There is always a WILA dealer near you.

Find your local dealer
World Map Figure